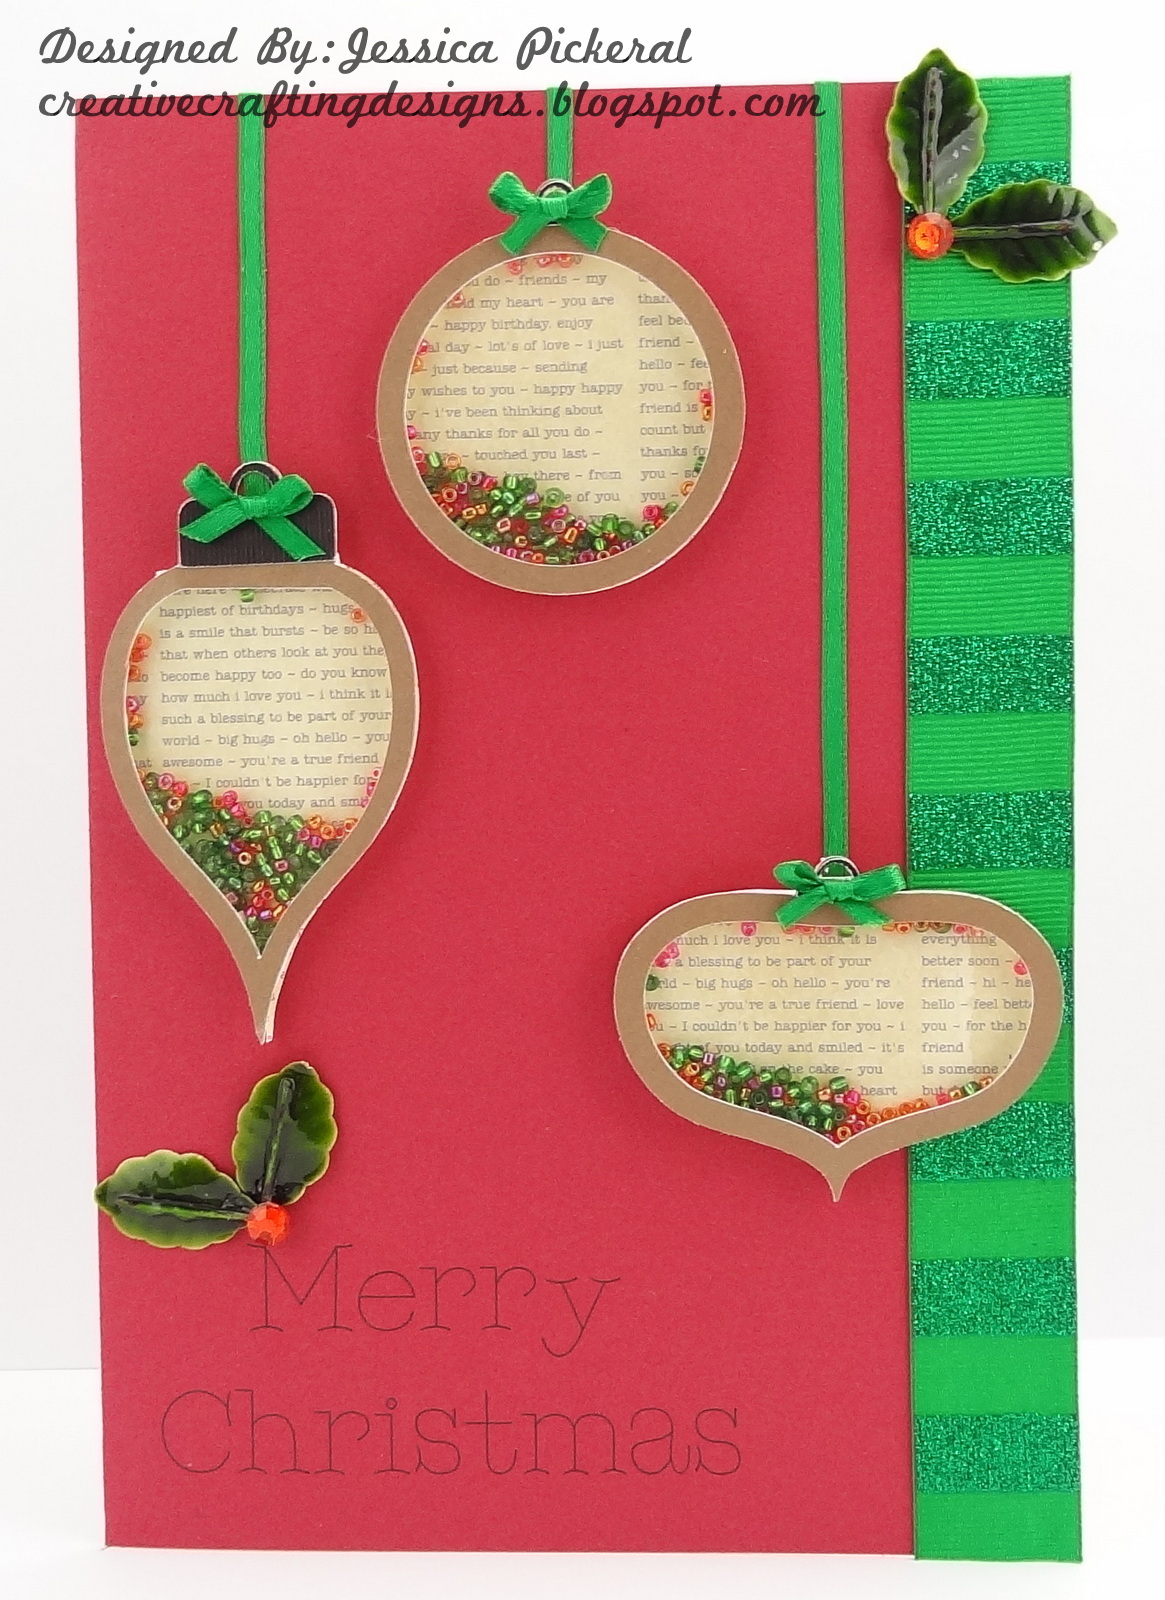
This Christmas ornament shaker card is fairly easy to make, even for the beginner crafter, so give it a try. To start with I cut everything out with my oh so favorite crafting tool, my Cricut Explore using DCWV cardstock and script paper. There are 4 pieces to the ornaments, the backing, the frame/top piece, the metal hanging thing (not quite sure that that is really called, lol), and the transparency/acetate. Note, when you load the file into your electronic cutting machine the transparency/acetate piece will be in the middle.
To assemble the shaker attach the transparency/acetate to the back of the frame. I used an Elmer’s CraftBond Tape Runner to do this. Take care not to get adhesive anywhere on the transparency/acetate other than where you attach the frame, it’s very hard to remove the adhesive. Once you are done with the first step attach foam tape to the outer edge, still on the backside of the ornament, on top of the transparency. I used Elmer’s CraftBond Foam Mounting Tape. I always double, sometimes triple layer my foam tape for shakers. To do that attach your strips of foam one on top of another, do this before you attach it to the shaker. Now for this shaker, since the frame is a bit thin, especially if you are making smaller ornaments, cut a thin strip from your layered foam tape (you don’t want it coming over the edges of the frame). Once you have your thin strip of layered foam tape cut (make sure it is long enough to go all the way around, a little longer is better as you can just trim off the extra), attach it to your shaker, it will easily wrap around. Make sure both ends of the foam tape bud up to each other snugly, this will ensure your shaker material will not fall out. Now that your foam tape is attached take a paper towel and a small amount of glass cleaner and clean the inside transparency/acetate, removing any finger prints you may have left behind (I use Windex). Also, if you have EK Success Powder Tool Applicator, brush it over the edge of the foam tape, from the inside, this will remove any sticky stuff and keep your shaker material from sticking to the edges (make sure to do this step before you clean it with glass cleaner. If you can tell in this picture the beads are sticking to the edge, I didn’t use my powder tool 🙁 You are now ready for the fun stuff, the shaker material… Add your shaker material to the inside of the foam tape, how much you use is up to you, don’t over do it though, you want the material to move freely. Things you can use for shaker material are, sequins, seed beads, micro beads, and glitter (I like the chunky glitter). Here’s a shaker tip, if you use sequins, add a few seed beads or micro-beads, this will help your sequins move around better. Now it’s time for the last step, attach the shaker ornament backing to the foam tape. Oh, I just told a little fib, that wasn’t the last step, lol. Don’t forget to attach the metal (actually paper in this case, lol) hanging thing to the front of the ornament.
OK, now that the shaker ornaments are put together it’s time to talk about the rest of the card. I used some miscellaneous red cardstock from my craft stash. Added some green Offary ribbon to make it look as though the ornaments where hanging from the top of the card. I also made small bows with that ribbon and attached them to the front of the ornaments. I love the little mini bows, they are just too cute. I then trimmed the edge of my card with green glitter striped ribbon. After I was done with all that I still felt like the card was missing something so I dug through my Christmas craft stash and found this really pretty Jolie’s boutique Christmas sticker with holly leaves. I pulled the holly leaves off and attached them to my card, they were the perfect final touch.
Let’s not forget about the “Merry Christmas” sentiment. I used my Cricut explore to write this, putting a Pilot Precise V5 black pen in the the pen housing and using the font Cricut Alphabet in the in the has a writing style setting.
Woo, that was a lot of writing, lol. Lets get on to the freebie. Please, please comment below and let me know what you think of my file. When you click the “Download Here” link below the picture it will take you to the download (Google Drive) once you are there, click the upside down arrow at the top of the page, then it will download. The freebie includes SVG and DXF files. ** Please note, each freebie download will be available for 2 weeks so make sure you get it while you can. Also, I’ve decided to leave my other files up a little longer for now, just in case you missed them. Links can be found under the Freebies tab in the navigation bar at the top of the page.
