Who doesn’t love birthdays and birthday cake? I know I do, especially delicious birthday cake. For my birthday in November I got the Mission Gold Pure Pigment watercolor set. With the hustle and bustle of the holidays and a cold that I am now calling the “Never Ending Cold” I am just now getting a chance to play with my new watercolors. I thought since I got the paints for my birthday it would be fitting to make something birthday related. After digging through all my stamps I decided to go with the Unity KOM set from November, 2017 called Better With Age. This kit has this super cute birthday background stamp with all these lovely cupcakes and cakes, and was just perfect for what I had in mind.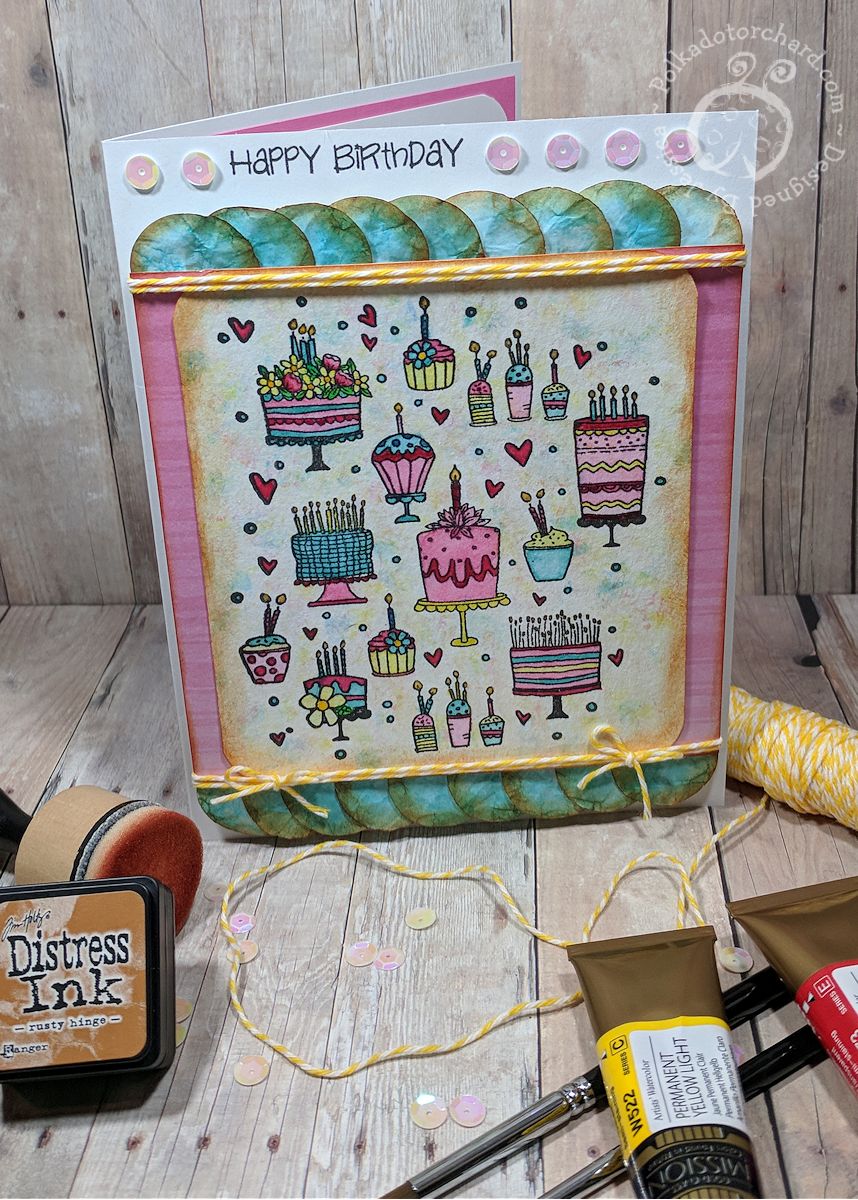 Lets talk a little about the watercoloring. The Mission Gold set I got is compiled of all lightfast and pure pigment paints. What does this mean you ask? Well, lightfast means light will not cause the colors to fade, at least for a very long, long time. Now, with them being a pure pigment paint means that each tube of paint contains single pigment colors. This is great because I can mix the colors without making mud.
The three colors I painted this image with were, Permanent Yellow Deep, Permanent Rose, and Peacock Blue (Cerulean Blue + Veridian). I actually found painting this background stamp and all its cute individual images with only three colors while trying to keep it looking clean and uniform quite challenging and a little nerve racking. Honestly, I almost gave up and moved onto a single image stamp but I kept plugging away at it and absolutely love how it came out.
The background was done with the same colors in the stamp and evolved from an accident. When I was almost done painting all the sweet cakes and cupcakes I smudged a finger print right in the middle of the background. I almost died at that moment thinking all that hard work was now trashed but, with some quick thinking I figured out how to fix it. A new technique I discovered, at least a new one for me, can you imagine how happy I was while breathing a big sigh of relief? Crumbling a paper towel in my hand then dipping a small part in my watercolor mixture (water + paint) then carefully and gently blotting it throughout my background, then repeating with the other two colors. I love how it created such a soft background. What do you think, do you see yourself trying this technique out?
Now, lets talk a bit about the scalloped ruffled border on the top and bottom of my image, it’s a diy/upcycled paper. So, I bought a big pack of school transparencies to make shaker cards, in between each transparency is this tissue like paper. It’s thin like a tissue paper but stronger so it doesn’t tear as easily and that is what I used for this part of my card. I then took my leftover peacock watercolor mixture, add more water to it and then began to rub my paper throughout the watercolor mixture. As the paper absorbed the water leaving pigment color behind I would spray more water in it and continued rubbing it into the mixture. I also crinkled the paper ever-so-slightly because anywhere there were creases in the paper it picked the pigment up a little bit more. Doing this created a background paper that matched my painted image perfectly. After it was dry I cut out circles with my 1 inch hole punch then distress the edges with some Rusty Hinge Tim Holtz Distress Ink which was also used along the edge of my image and pink patterned paper. After running my ATG tape gun along the top and bottom of the card I lined it with my scalloped circles overlapping them ever so slightly.
So, to finish up my card I wrapped yellow twine around the top and bottom of my image. Using the same yellow twine I very carefully tied little bows to the left and right of the bottom twine, this added a super cute touch to my card. I then adhered a piece of Fun Foam to the back of my image so it would pop off my card. After layering my Recollections card base, my pink patterned paper from Pink Paislee ” Take Me Away” 6×6 paper pad and my water colored image with it embellishments, I now have a lovely finished birthday card. Which, I absolutely love so much that I actually wanted to keep this card.
Something I forgot to mention above when I was talking about watercoloring; I also used Kuretake’s Gem watercolors. The set has a gold that is absolutely stunning and looked beautiful as the candle flames. I couldn’t just stop there with a sparkly gold candle flames I had to add it to my background. Doing so, I watered down the gold gem color tremendously, then lightly brushed it throughout the background to create a bit of a sparkly shimmer. I’m so sorry it didn’t show up super great in the picture so I’m not sure if anybody can even tell their sparkle in it.
Lastly, the watercolor paper used was Canson XL watercolor paper. Which works good for cardmaking especially if you don’t over saturate the paper. If you do plan on over saturating it, it needs to be taped down around all the edges on a board because it will buckle and warp, but having it taped down will help it to shrink back mostly flat. Please note because this background image had so many little images and I did a wet on dry painting I had no warping.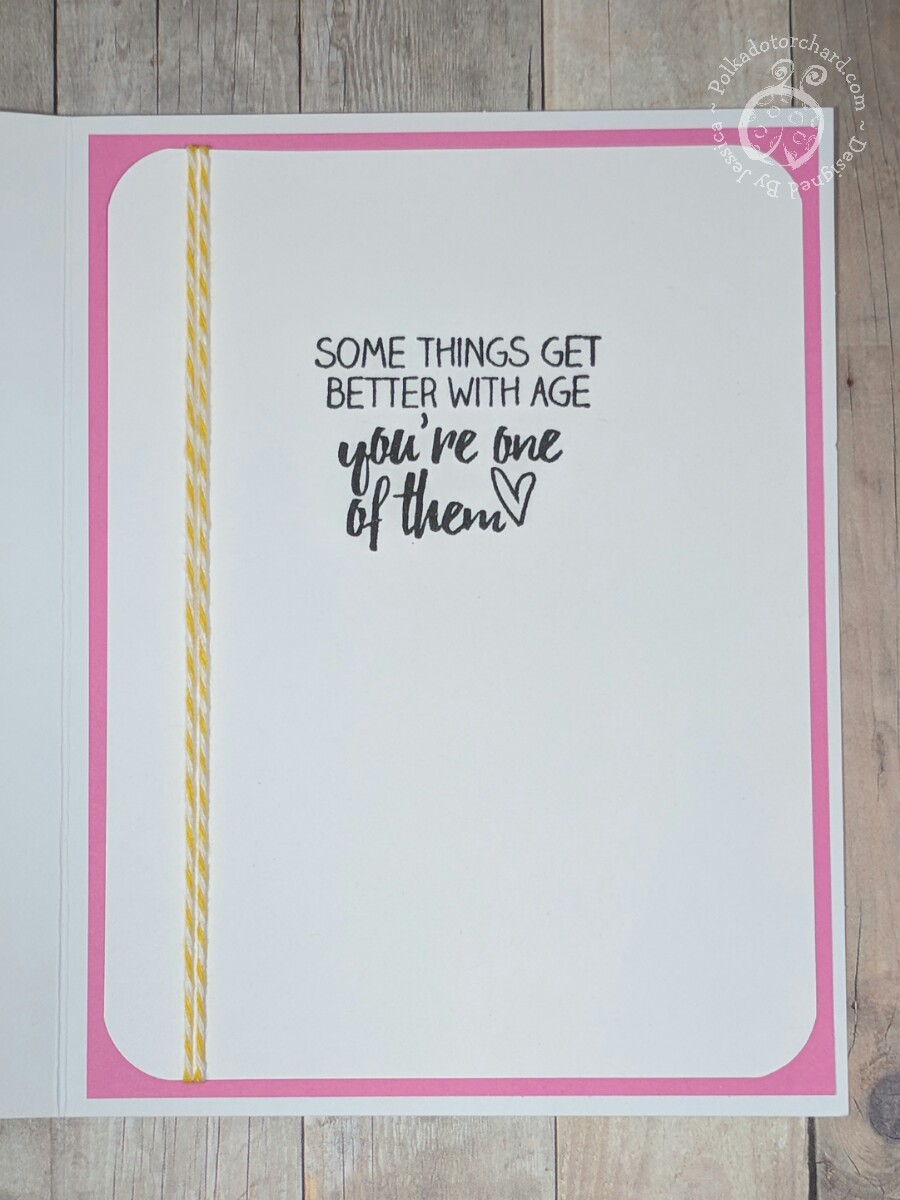 Let’s not forget about the inside of the card. One of the things I love so much about the Unity Kit of the Month stamps sets is not only the wonderful images they come with but the sentiment stamps that they always include to coincide with the images. Using Onyx Black Versafine ink, the same ink used on the birthday background image, I stamped the sentiment “SOME THINGS GET BETTER WITH AGE you’re one of them”. This sentiment was included in The Better With Age (11/17) KOM. The sentiment was not enough so I did a little twine wrapping with the same yellow twine I used on the front. Then finished up by matting my Neenah Exact Index white cardstock onto some pink Recollections cardstock.
That’s it for today’s post, I hope you learned something new. Please comment below, let me know your thoughts on today’s card and also let me know if you ever stumbled upon a new technique by accident, and if so what that technique was.