Hello everyone! Jessica here with one more Christmas card to share with you for the My Treasured Kutz “Christmas In July” Sneak Peek Blog Hop. Even though today is the last day of the hop don’t fret “Christmas In July isn’t quite over, I’ll be back next week with more Christmas cards to share. Now on to today’s hop 🙂
My Treasured Kutz “Christmas In July Blog Hop” Day Three.
If you missed “Day Two” click HERE.
If you missed “Day One” click HERE.
Hop between our Designers to see what they have created with all of our New Products. Each day you will have a chance to win a $10.00 Gift card to My Treasured Kutz store, along with a “FREE” SVG Digital Cut File per day, and a 25% discount code for any purchase at My Treasured Kutz for the month of July. To participate, please visit each of the Designers Blogs for inspiration for all the Christmas Products. Comment and show them some love for all their hard work. We will choose One Winner each day to receive the $10.00 Gift Card to My Treasured Kutz store. The winners will be posted Saturday, July 11th on the My Treasured Kutz Blog. So check back and follow the instructions posted there if you are one of the winners. Also, as your hopping between blogs, look for the post with the link for the Daily “Free” Digital File.
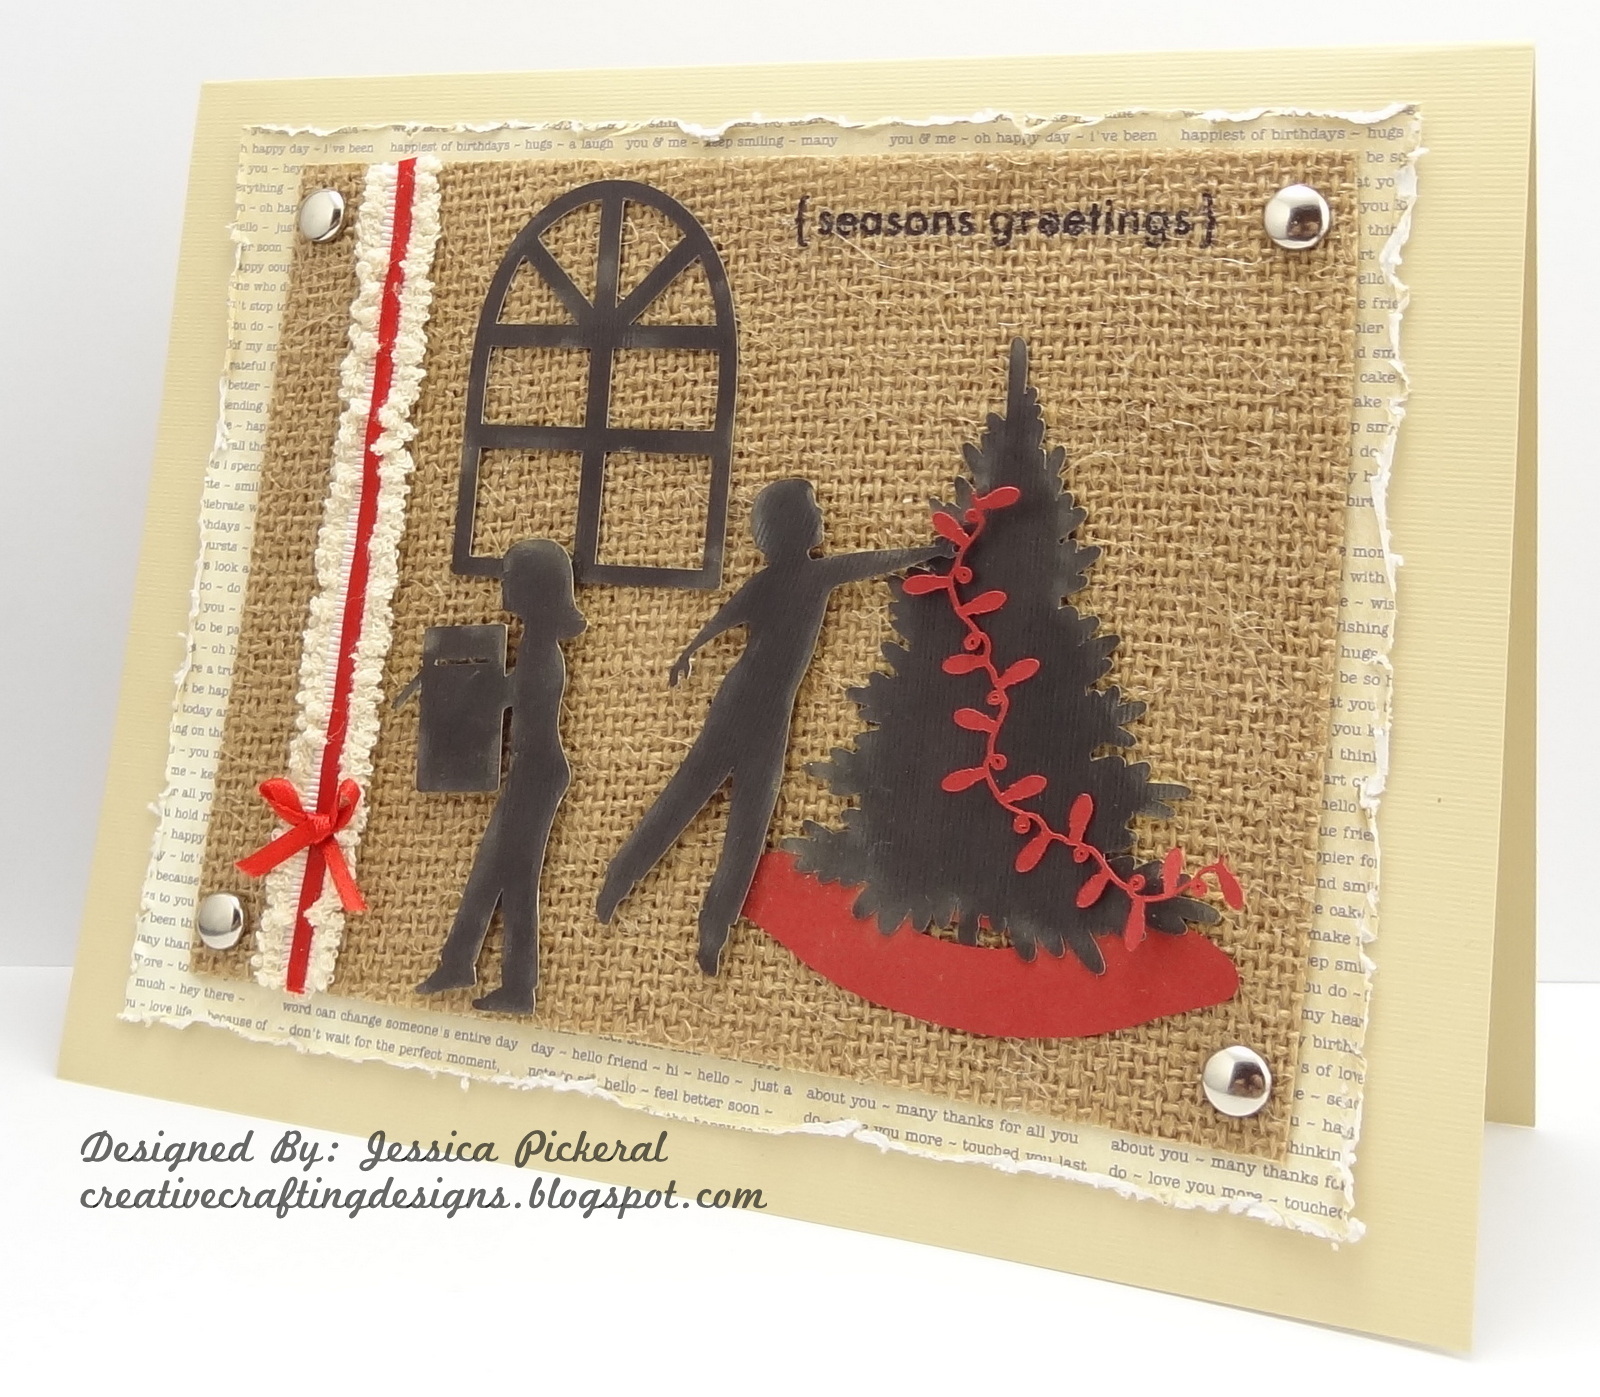
Decorating The Christmas Tree is the card I’ve created to share with you today.
I do have to say this card gave me a bit of trouble at first because working with black silhouette images is all new to me. After thinking on it for a while it came to me and I love how this card turned out. It actually ended up being a really easy card to make.
What I Used
~Cricut Explore
~My Treasured Kutz SVG Digital Cut File “Decorating The Tree”
~DCWV Cardstock
~Recollections Patterned Paper
~Burlap
~Silver Brads
~Making Memories Edge Scraper
~Scotch Quick-Dry Adhesive
~Mod Podge
~Pain Brush
~Elmer’s CraftBond Foam Mounting Tape
~Elmer’s Craft Permanent Tape Runner
~Offray Trim (Tan Ruffled)
~Offray Ribbon (Red)
~Making Memories {Seasons Greetings} Rub-On
~We R Memory Keepers Crop-A-Dile
~Tan Chalk
~Disposable Lip Applicator (For Chalk)
~Chalk Pom-pom
To start with I cut out all my paper pieces with my Cricut Explore. I then used my Edge Scraper to distress the edges of my script patterned paper and attached it to my card base with my tape runner. After the patterned paper was attached, I lined up the burlap in the center of the card and used my Crop-A-Dile to punch a hole in all four corners, then attaching it with brads.
*When using burlap with my paper crafts I stiffen it with Mod Podge. It keeps it from fraying and makes it easier to work with. I do this by laying out a piece of parchment paper for my work mat. I then use a large paint brush and evenly apply Mod Podge to both sides of the burlap. Then to dry I hang the burlap up with a pants hanger (the ones with the claw clips). If you decide to use this technique, start with a larger piece of burlap (make sure the width is slightly wider then the hanger, you can cut the length as long as you want. Once it is dry it will be ready to cut to size for your craft projects. Also, when I do this technique I use a tightly woven burlap and matte Mod Podge*
Once I had my card base all put together, I chalked the edges of the silhouette cut outs with tan chalk and then attached them to the card. The boy and girl were attached using foam tape to make them pop a bit. The other cut pieces were attached using Scotch Quick-Dry Adhesive (applied with a paint brush).
To finish up this beautiful card I added the tan ruffled trim, gluing the red ribbon to the center of the trim, then adding a little red bow to the bottom. (Adhesive used for the trim and ribbon was Scotch Quick-Dry, applied with a paint brush)
Oh, I almost forgot about the {Seasons Greetings} sentiment, it’s a rub on. Rub-Ons work perfect with Mod Podge treated burlap.
If you miss one of the posts, here are their direct links:
Thank you for stopping by and hopping along!
**Remember to come back tomorrow for more
creative, exciting projects**
Have A Blessed Day!!