Hello all my crafty friends, I hope everyone has been having a wonderful summer. Today I have two Christmas cards to share with you. The cards were created for My Treasured Kutz “Christmas In July” Sneak Peak Blog Hop. You know, every year around Christmas time I always tell myself “This year I’m going to make homemade cards to send to all my family and friends”. Well, I end up getting so busy with other family Christmas activities, that I end up not having time to make them. I am so thankful that this 3 day hop came about because it’s given me a jump on my Christmas cards, and I’m ready to keep making more. I now see how great “Christmas In July” is, because it gives people a reason to create Christmas stuff without having to wait until December. Anyways, read below to find out more about the blog hop and to see what and how I created my Christmas cards.
My Treasured Kutz
“Christmas In July Blog Hop”
Starts Today.
During the next 3 days you can Hop between our Designers to see what they have created with all of our new products. Each day you will have a chance to win a $10.00 Gift card to My Treasured Kutz store. Along with a “FREE” SVG Digital Cut File per day, and a 25% discount code for any purchases at My Treasured Kutz for the month of July. To participate, please visit each of the Designers Blogs for inspiration for all the Christmas products. Comment and show them some love for all their hard work. We will choose One Winner each day to receive the $10.00 Gift Card to My Treasured Kutz Store. The winners will be posted Saturday, July 11th on the My Treasured Kutz Blog. So check back and follow the instructions posted there if you are one of the winners. Also, as your hopping between blogs, look for the post with the link for the Daily “Free” SVG Digital Cut File and the 25% Discount Code.
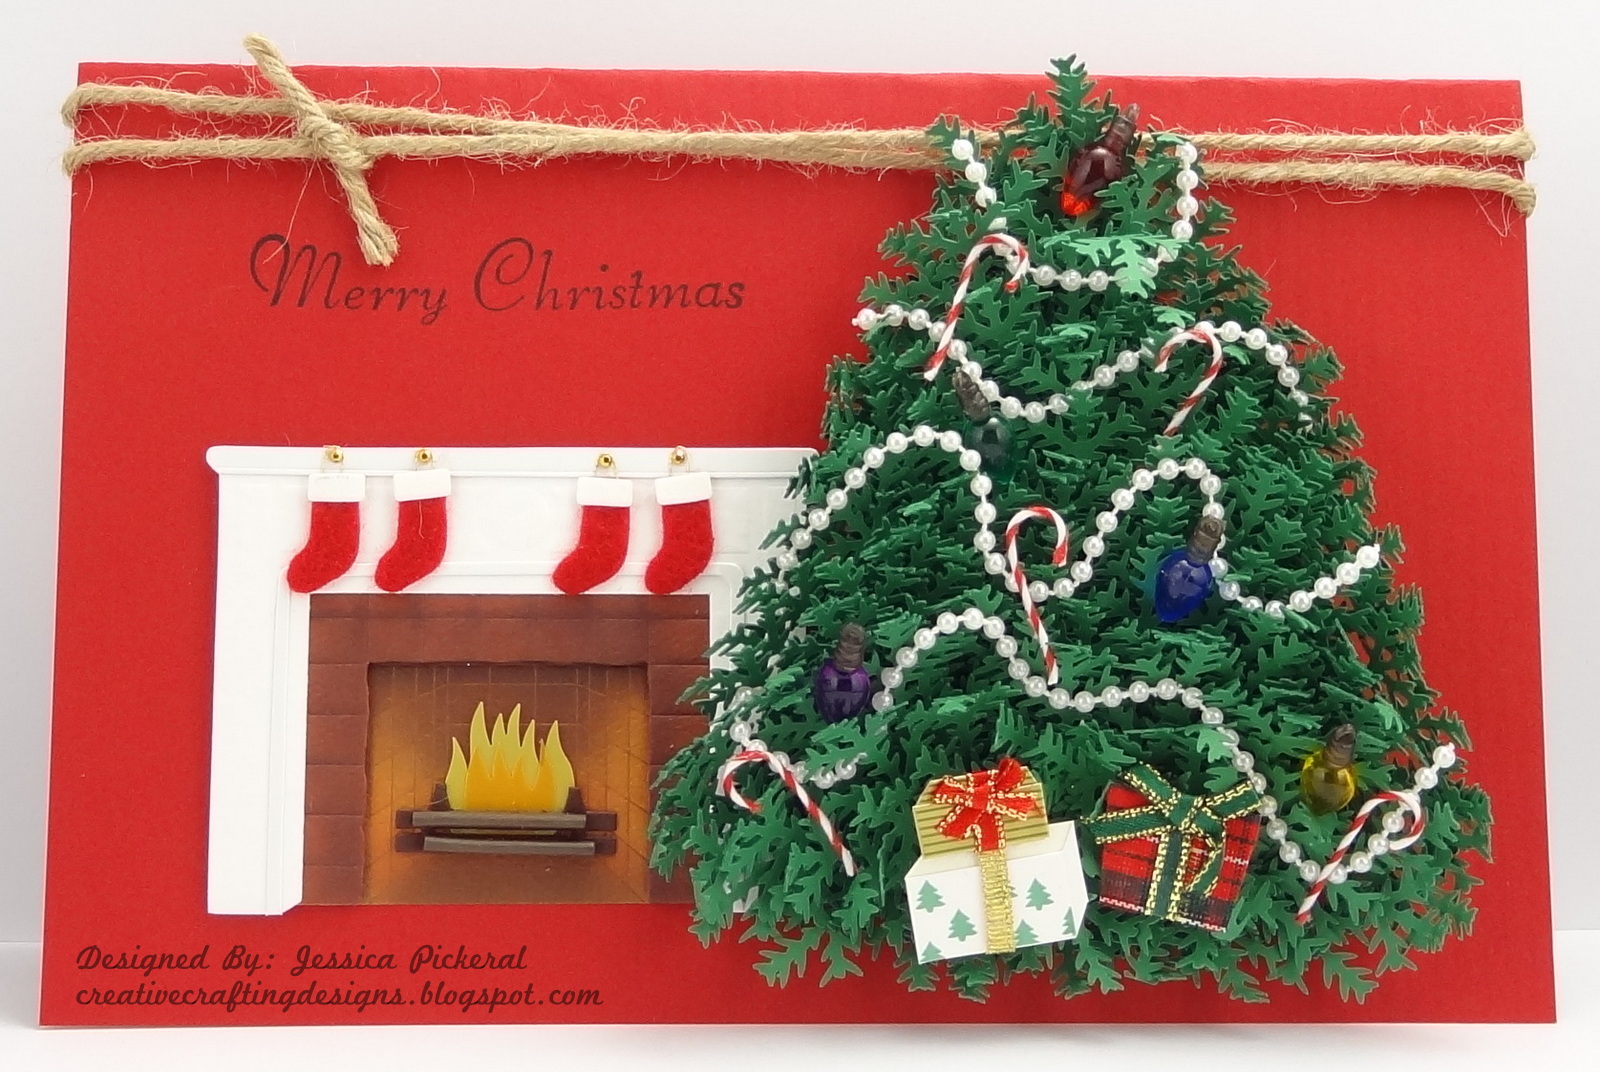
Now, it’s time for me to share my cards. For my first card I have this beautiful Evergreen Christmas Tree card I made.
To start with I used my Cricut Explore to cut the card base and a triangle measuring 4 inches tall and 2.75 inches wide (I’ll explain the triangle in a minute) out of cardstock.

Now, on to how I created this beautiful Evergreen Christmas Tree. This is where the triangle I cut comes into play, it is the base that I glued all the evergreen branches on. The evergreen branches were cut using a My Treasured Kutz metal die called Evergreen Branch and my Sizzix Big Shot. I cut out several branches and glued them on using Scotch Quick Dry Adhesive (only applying a small dot to the end of the branch). I started at the top center of the triangle. I then moved down slightly gluing a branch to the right and left at a slight angle and also adding one to the center of that same row. As I moved down the triangle base I added more branches to the right, left and center to fill it in. After all my evergreen branches were glued on I slightly curled the tops of them outward to create a full look making it more realistic. * The initial idea for this tree was not my own. I got the idea from Kattie Caracciolo (click her name and it will take you to her post that I got the idea from).*
It’s time to decorate the tree now! I broke into my craft stash for this part. I used strings of mini pearls, some mini candy canes, and Dress It Up Button Christmas lights which are actually called Jack Frost. All decorations were glued on using one of my favorite adhesives, Scotch Quick-Dry, it dries quick and holds strong.
Now that the evergreen tree is finished it’s time to decorate the card. I first attached the fireplace which is a Jolee’s Boutique Dimensional Sticker, and then glued down my tree. The “Merry Christmas” sentiment was applied using a miscellaneous clear stamp from my stamp collection. For a final touch I tied some twin to the top of the card.
I do have to say how much I love the My Treasured Kutz Evergreen Branch metal die. I feel there is so much you could make with this die; a wreath, some garland to trim your card, or even bunch a few branches together adding things like pine cones, snowflakes, or red berries. Your imagination in limitless.
*~*~*~*~*~*~*~*~*~*~*
For my second card I have this simple with a touch of vintage snowflake card I made.
Don’t you just love this snowflake? I know I do! Well, it’s today’s SVG freebie for doing the hop. Make sure to keep an eye out as your hopping along for information on how to get this beautiful My Treasured Kutz Snowflake Doily SVG File; it’s posted in one the girls blogs along the way.
I pretty much created this entire card using my Cricut Explore. Well, except for the inking and chalking. The snowflake SVG, the mat behind it and the card base were all cut with my Cricut Explore.
For the snowflake I used white DCWV textured paper and chalked all the edges, even the edges of all the circle and oval cuts using blue chalk and a disposable lip applicator. I then used a chalk pom-pom to spread the chalk out on the card, adding a little extra to the outside edge and edge of the center circle.
The card base was cut with some kraft paper from my craft stash. The sentiment “Christmas Blessings” was written with the pen feature of my Cricut Explore. Both words were written with the “Has a Writing Style Option” but I chose two different fonts; Cake Basics for “Christmas” and Baby Steps for “Blessings”. The pen used to write this sweet sentiment is the Cricut metallic blue pen.
If you missed one of the posts, here are their direct links:
Thank you for stopping bye and hopping along!
**Remember to come back tomorrow for more
creative, exciting projects**